Pad Printing vs Screen Printing for USB Drives: Which Holds Up on ABS, Aluminium and PVC
Two quotations arrive for the same logo on the same drive shell, the unit prices differ, and both sheets just say printing. The gap is usually pad print against screen print, and nothing on the paperwork tells you which process you were quoted. It starts to matter on a curved shell, on soft PVC, and on any logo carrying more than two colours. This guide covers where the two diverge, which shell material each suits, the artwork rules that decide the method, and the wear checks worth running on a printed sample.
Where pad printing and screen printing diverge on a USB shell
Pad printing lifts ink from an etched plate onto a soft silicone pad, then rolls that pad across the part. Because the pad deforms, it follows curves, steps, recessed panels and the sides of a moulded novelty shape — it exists to print on surfaces that are not flat.
Screen printing pushes ink through a tensioned mesh stencil held a fraction of a millimetre above the part. The ink film is thicker and noticeably more opaque, coverage stays even across a wide area, and one pass can fill a face that pad printing would need several hits to cover. Its limit is geometry: the screen is flat, so the marking face has to be flat or curved in one direction only.
Pad print wins on shape, screen print wins on area and opacity. A flat aluminium barrel carrying a 60 mm logo comes out denser in screen print; a moulded PVC character whose marking area wraps around a shoulder can be reached by pad print and by nothing else in this pair. Geometry is usually what the price difference is paying for.
Matching the method to ABS, aluminium and soft PVC bodies
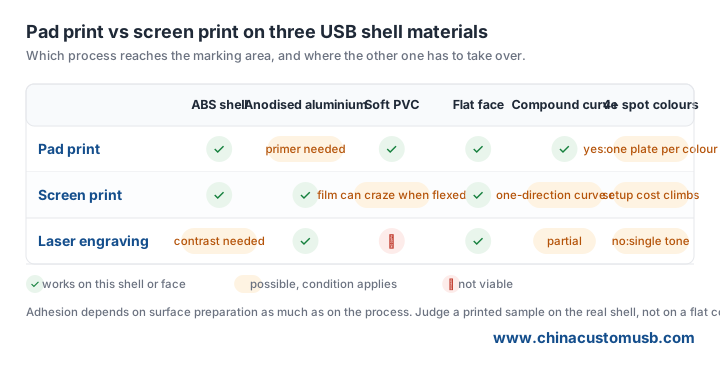
ABS shells. Both processes work, so the choice is driven by shape and colour count rather than material. A flat ABS face with one spot colour prints cleanly either way, and screen print gives better hide on a black shell because the ink film is thicker. Where the body has a step, a recessed nameplate or a moulded ridge running through the marking area, pad print takes over. ABS also needs a surface preparation step before either ink will hold: flame or plasma treatment, or a primer coat, and that step belongs on the quotation rather than in a surprise sample.
Aluminium shells. An anodised or brushed aluminium barrel is the friendliest surface for screen print, because the barrel is a simple cylinder and the ink sits on a stable, non-flexing substrate. Pad print on bare aluminium is where adhesion complaints come from: ink on untreated metal can be lifted with a fingernail at the logo edge, and a primer is required to make it stay. On anodised aluminium, laser engraving outperforms both on wear, at the cost of colour.
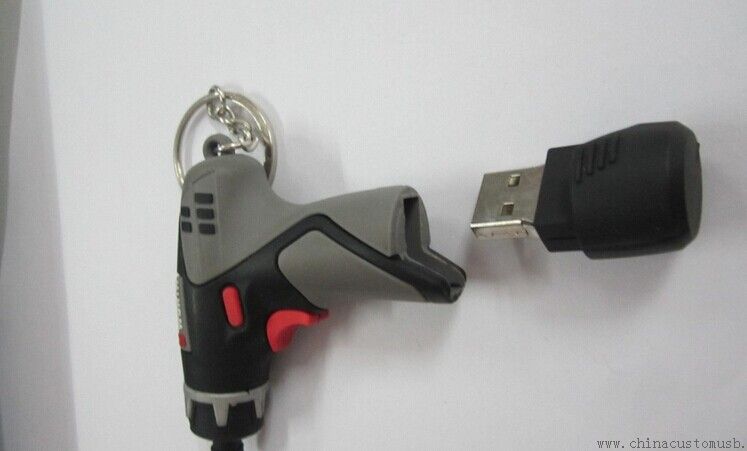
Soft PVC bodies. Moulded PVC is the case pad print was built for. The shell is flexible and covered in compound curves, and the silicone pad wraps those curves without distorting the logo beyond a small, even stretch. Screen print on a soft PVC part is a compromise: the thicker ink film is less able to flex with the body, and a part squeezed in a pocket or a bag can craze along the ink edge. Plasticiser migration inside soft PVC also works against adhesion over time, so keep a printed PVC sample and re-check it weeks later rather than judging on arrival.
Colour count and artwork files: when the method changes the logo
Both processes are per-colour setups. Pad print needs one etched plate and one pad stroke per spot colour; screen print needs one mesh screen and one pass per spot colour. A four-colour logo therefore means four setups on either route, which is why colour count drives cost on both methods more than the process name does.
Send vector files only, with spot colours specified as Pantone references and all text converted to outlines. Gradients and photographs are a signal to change method: neither process reproduces continuous tone on a small curved face, so a photographic logo needs UV digital print or a printed label.
Feature size is the second constraint. Screen print resolution is bounded by mesh opening, so fine strokes and small type fill in and close up; plan on bolder strokes and larger lettering than the artwork suggests. Pad print holds finer detail, but the pad stretches the image slightly as it wraps a curve, so lines thicken at the edges and a hairline gap between two colours can close. On a tight two-colour registration, expect to redraw rather than reprint. Include a marking-area drawing with dimensions and the keep-out distance from any mould seam, because ink run-out into a seam is a rejection reason on its own.
Wear checks to run on a printed sample before you approve it
Judge a printed sample on evidence.
Adhesion by tape. Score a cross-hatch grid through the ink, press a specified tape over it, pull at a steady angle and count how much ink comes away with the tape. The cross-cut procedure is standardised as ASTM D3359, and the tape grade matters, so ask which tape was used when a factory reports a pass.
Solvent rub. Rub the same spot with a cotton bud soaked in isopropyl alcohol, count the double rubs, and watch for ink lifting or a gloss change before the count is reached. This is the check that separates a cured ink from an under-cured one, and under-curing is a common reason a bulk lot fails in the field after the sample passed.
Abrasion at the edge. Rub a hard eraser or the edge of a coin across the logo border. Ink failure almost always starts at the edge of the mark, so rub the border rather than the centre.
Two more checks cost nothing: hold the sample against a Pantone chip in daylight, not under a desk lamp, and look for registration offset between colours, which shows as a visible step at a shared edge. Run all of it on the actual shell material — a flat coupon proves nothing about a curved PVC part and will not show the plasticiser effect that appears weeks later.
What the quotation line should spell out
A quotable printing line names the process, the spot colours with Pantone references, the number of print positions, whether plate or screen setup is a one-off charge, whether pre-treatment such as flame, plasma or primer is included, and the marking-area dimensions the factory works to. Compare two quotes only when both lines carry those six items.
Send the artwork file and the shell material you have in mind, and we will return one pad-printed and one screen-printed sample of the same logo on the same body, so the difference shows on the part instead of on a price sheet.
Need custom USB drives for your next project?
Factory-direct pricing, free digital proof and a 7-day sample turnaround.
Get a free quote